Maker Projects
Sine Machine
Background
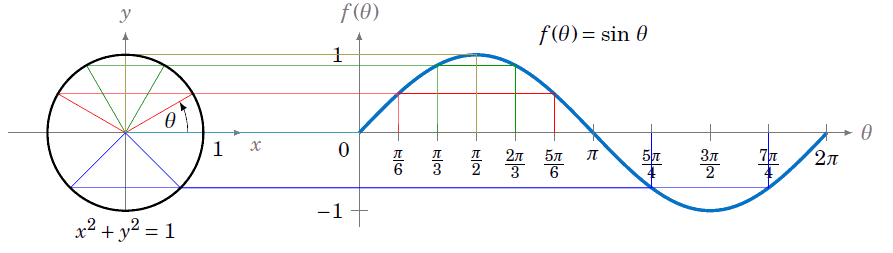
This inspiration for this project was inspired by Reuben Margolin's presentation on PopTech where he showed his kinetic wave sculpture. This was around the time I planned I presenting at Maker Faire. Our group decided show how kinetic sculptures could be used to visualize and manipulate STEM concepts, such as a sine wave. The sculpture creates a sine wave pattern, showing its periodic movement through space and time. It can be used to teach students about the relationship of this trigonometric function to a unit circle.
Juliet and I made a simple, working prototype for our presentation that was disassembled afterwards. Later that summer, I continued the project and built an improved sine machine with the help of my mentor, Oren Connell, and his MakerSpace at Ann Richards.
Design Process
|
Materials and Tools: |
|---|---|
|
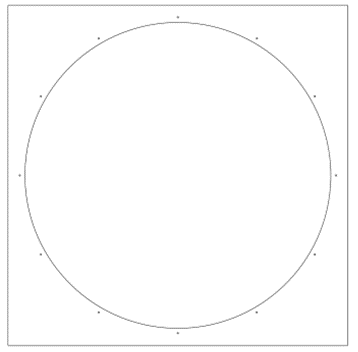
Using Adobe Illustrator, I made a design for the front face of the sine machine (available here. We laser cut the wood sheet so that a large 9" circle and 12 holes (a few millimeters in diameter, equidistant from the circle and separated byu 30 degrees) were cut. |
|
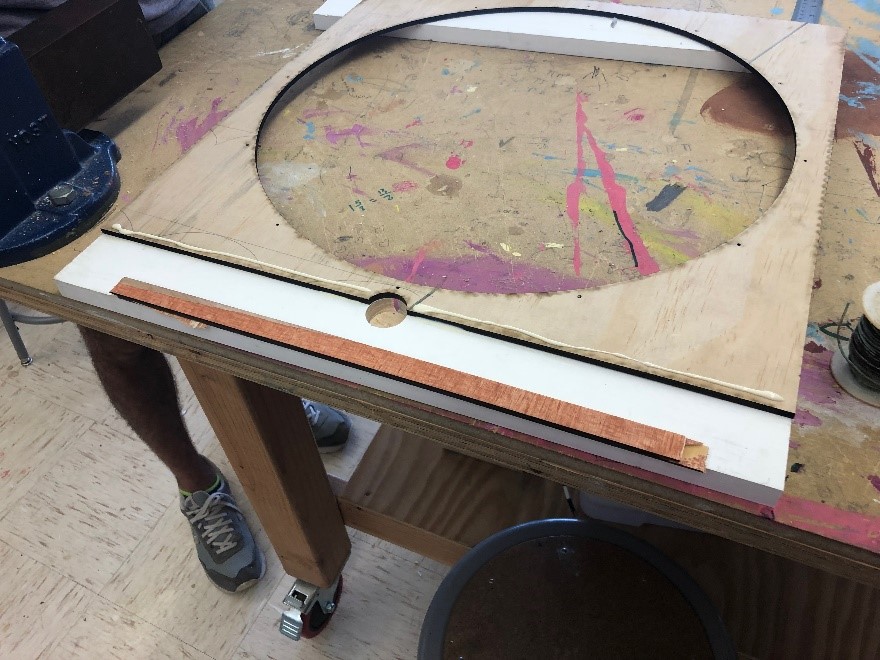
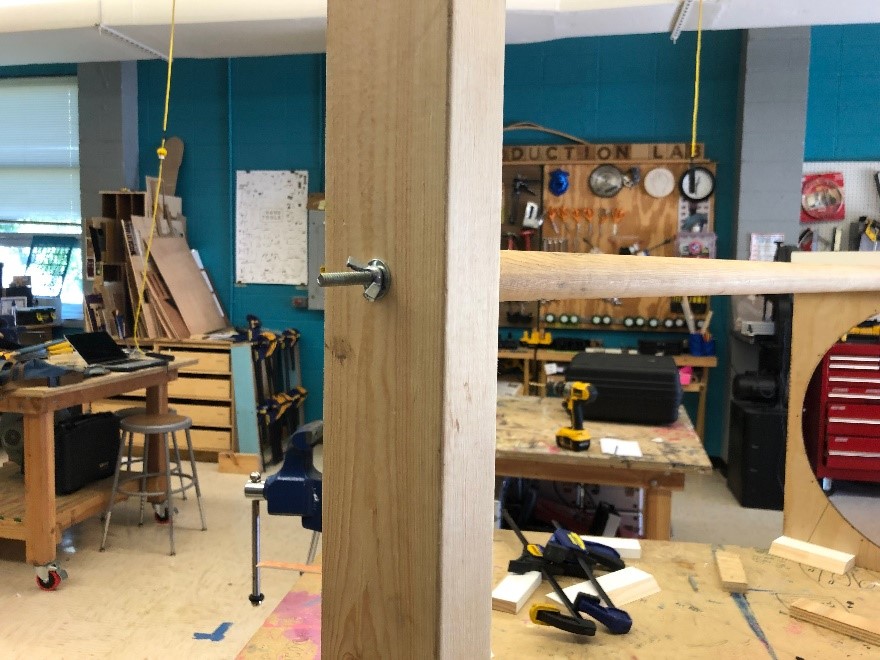
We glued one of the 3/4" by 1.5" wood boards at the top of the sheet on one side to add support and drilled a bling hole (doesn't go entirely through, leaving about 1/4" undrilled board) into the board and sheet, centered above the first small hole. The hole needed to be large enough to fit the dowel rod tightly. The other board was glued on the other side of the sheet. |
|
A similar hole was drilled for the 2” x 4” wood board at the same length measured from the bottom of the board and sheet. Finally, a through hole (drilled all the way through) was made at the center of the blind holes made in the wood board and sheet, large enough to fit the threaded rod. |
|
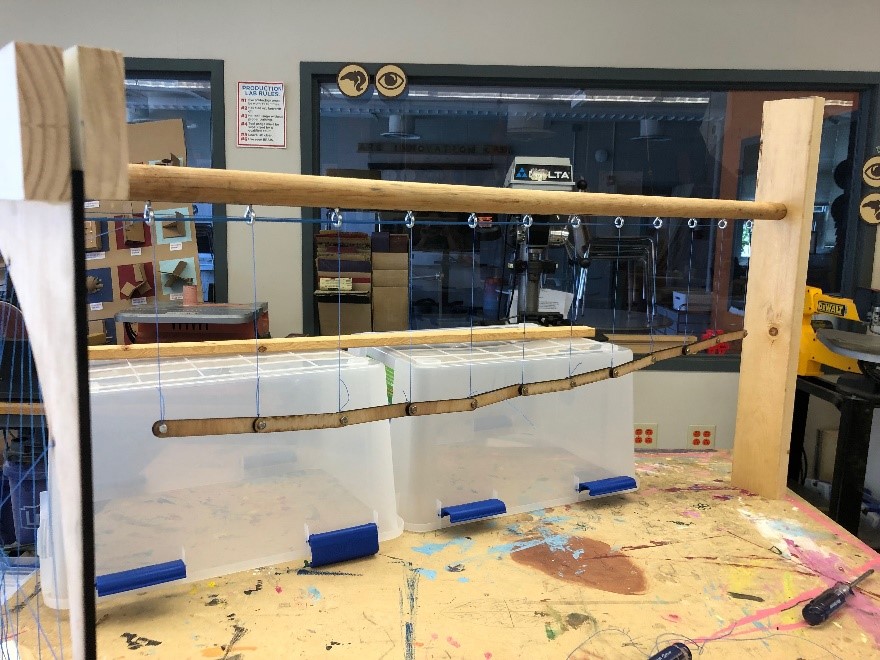
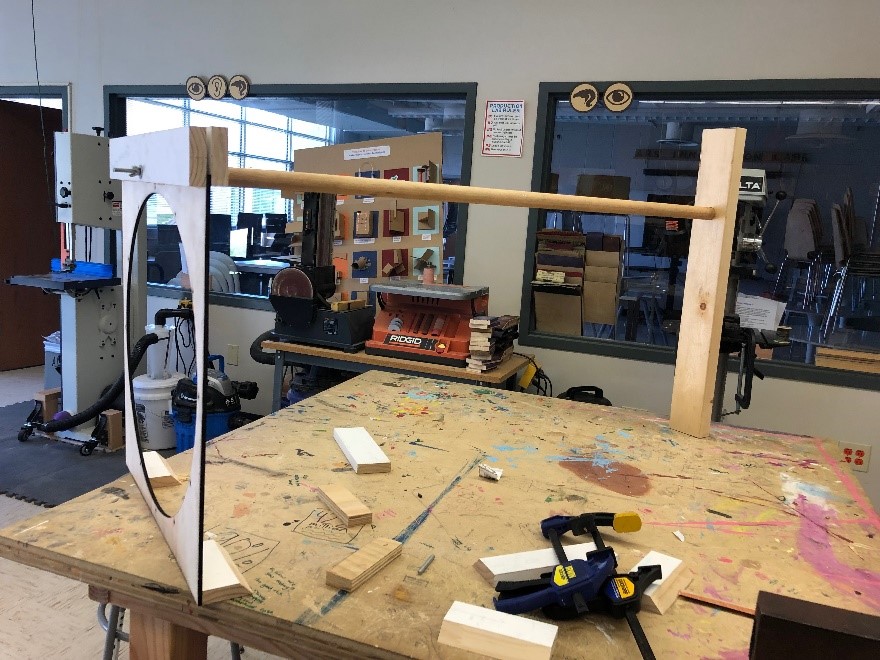
We drilled a hole into both ends of the rod a few inches deep, fit the threaded rod, and secured with epoxy. The dowel rod was positioned and secured with wing nuts and washers. |

|
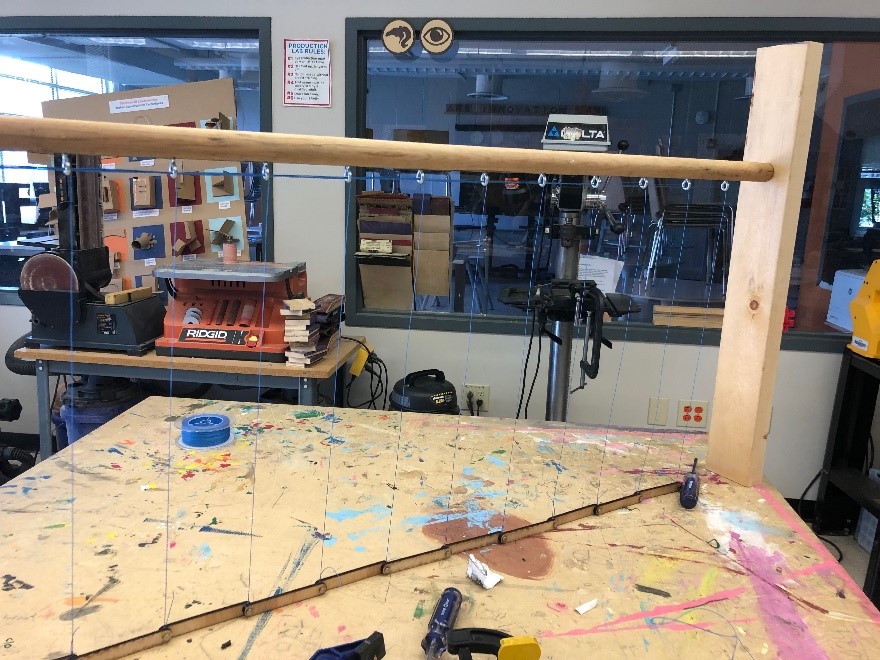
We drilled pilot holes into the dowel rod, 3.5" apart and screwed in eye bolts. We laser cut the segments that would make the wave. These were pill shaped with holes at each end. These were connected together with hext bolts and washers. String was tied at each "joint", run through the eye bolts, and strung around the holes in the wood sheet. |
|
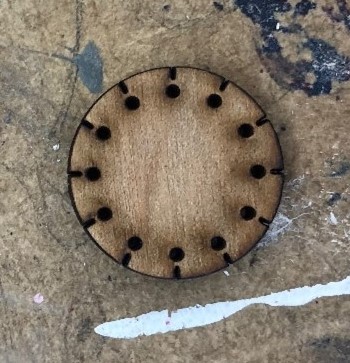
We also created a piece to hold the strings together using a circular piece with holes and notches that each string would run through to stay secured. |
Results
The front frame of the sine machine unfortunately broke during a move. I plan to fix the frame, and I have some ideas for revised models using other material and easier ways to transport the machine.
Reflection
I enjoyed working on this project with other makers. I thank Juliet for her help with the first prototype and presenting with me at MakerFaire, and thank Oren for the help and resources provided by Ann Richards Makerspace. Making is always more fun with others.
I look forward to working on more Maker projects, especially those with math connections. Although science is my area of expertise, I love math and I am always disheartened by the lack of interest and confidence students frequently have in math classrooms. Making provides a fun, interactive, and meaningful way to connect (or perhaps "kinect") with challenging math concepts. Instead of memorizing the unit circle and looking at a function on a graph, have students build a piece of art that they can manipulate and learn from.